
Writing XSLT with BBEdit
Main topics: ResourcesMacGuidesDownload
Author: Marco Balestra

The purpose of this page
XSLT is a very verbose programming language.
Years ago Marc Liyanage wrote a “Glossary” for BBEdit, and later on Marco Balestra enriched it by adding selection scripts and indentation.
The time passed, and BBEdit “Glossary” feature is now “Clippings”.
In the meanwhile the official page of Marc Liyanage is offline, and he’s not prone to restore it.
So here there is the replacement:
- A short guide on clippings installation
- A short guide to main configuration tips
- The clippings package itself, ready and available.
Given the above steps, BBEdit become the fastest XSL/XSLT development editor you can find.
Even if you own/use some specific professional editor like Oxygen, you’ll find that BBEdit is by far the fastest editor, also if you still use Oxygen (or another tool) to debug.
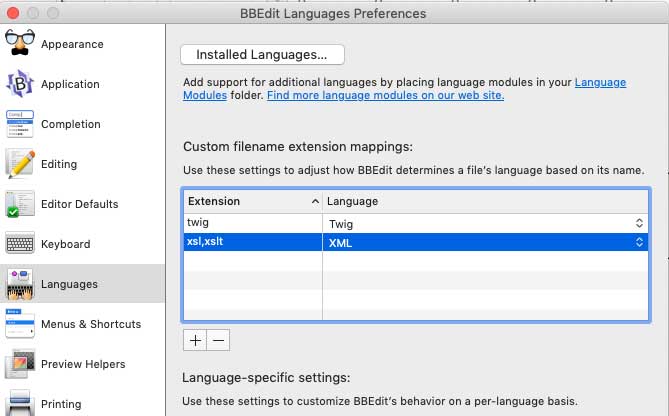
Associate XSLT to XML
First of all we want to teach BBEdit that XSL/XSLT is XML.
This can be done in BBEdit Preferences:
Download a clipping set
There are many clipping sets you can find around and/or on BBEdit site.
Here you can find the XSLT set (by Marc Liyanage and Marco Balestra):
…and JSP set (by Marc Liyanage):
How to install a Clipping set
In this folder ~/Library/Application Support/BBEdit/Clippings you can find pre-defined BBEdit clipping sets, and add your own set or install a downloaded set.
A clipping set is a folder whose name ends with the filename extension it will be associated to, containing several text files (and/or subfolders grouping files).
Folders and subfolders names can start with a numbering in the "xx)" format, i.e.:
- “
01)XSLT Glossary.xsl” - “
02)JSP Glossary.jsp” - “
03)CSS.css” - “
HTML Glossary.html”
The leading “xx)” isn’t considered in clipping set name, and is useful for sorting sets list.
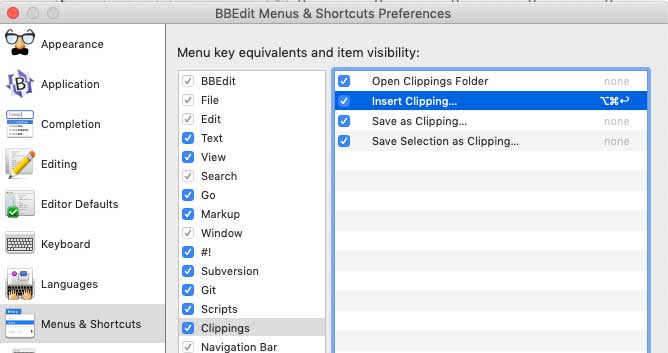
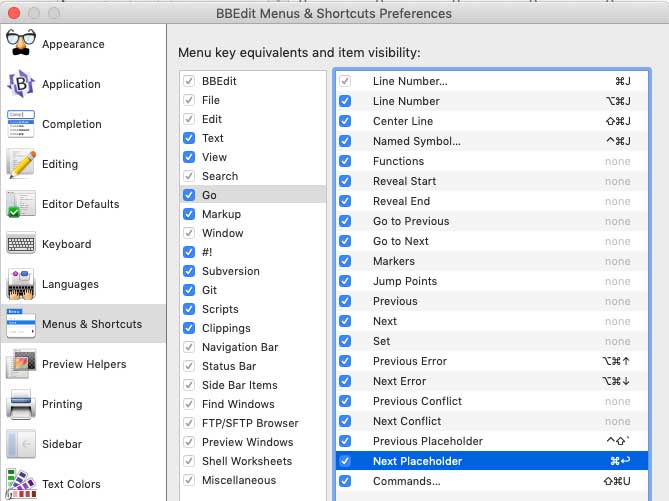
Define shortcuts
In order to take the full advantage of a clipping we could set up a shortcut for the menu functions involved in the facility.
I use:
- ⌘⌥↩ (command-option-enter) for Clipping > Insert clipping…
- ⌘↩ (command-enter) for Go > Next Placeholder
This can be done in Preferences:
Using the clippings
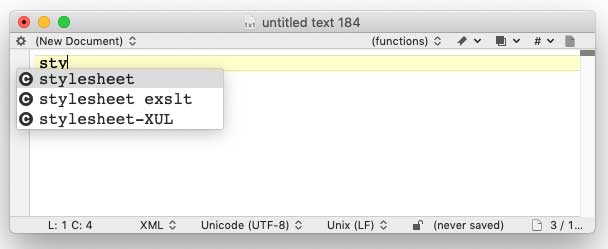
Create a new document ans chooose “XML” as a language, or open an empty text file with “.xsl” or “.xslt” extension.
Now in the empty document start writing, e.g.: sty
Matching autocompletion from the appropriate clipping set will popup, or we could manually choose the clipping from the menu:
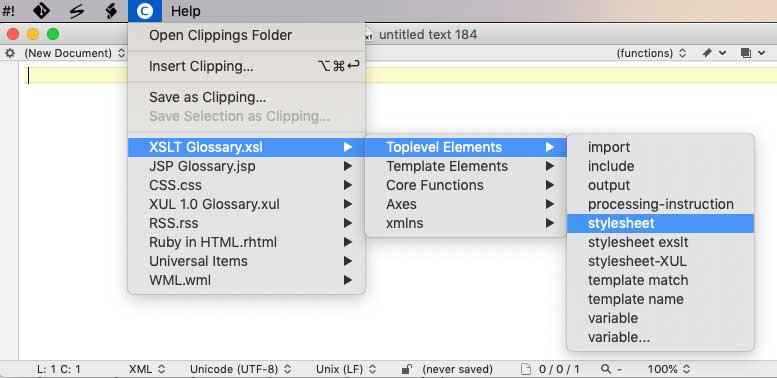
We could also press ⌘⌥↩ and trigger the clipping selector, find the appropriate clipping in the list and double-click it.
Now let’s say we’ve choosen to insert the XSLT’s “stylesheet” clipping.
We’ll be prompted for parameters and quickly choose from options lists:
- output: xml
- omit declaration: no
- encoding: utf-8
And eventually the clip explodes into:
Navigating the placeholders
The “<#something#>” strings are the placeholders, that we can easily select through the previousley defined shortcut - i.e.: ⌘↩
That’s all.
The verbosity of XSLT is no longer an issue, e.g. “choose” quickly explodes into:
© and Credits
- XSLT glossary by Marc Liyanage and Marco Balestra
- JSP glossary by Marc Liyanage
- This page created by Marco Balestra for faqintosh.com